Write and Review Test Cases
3 min read
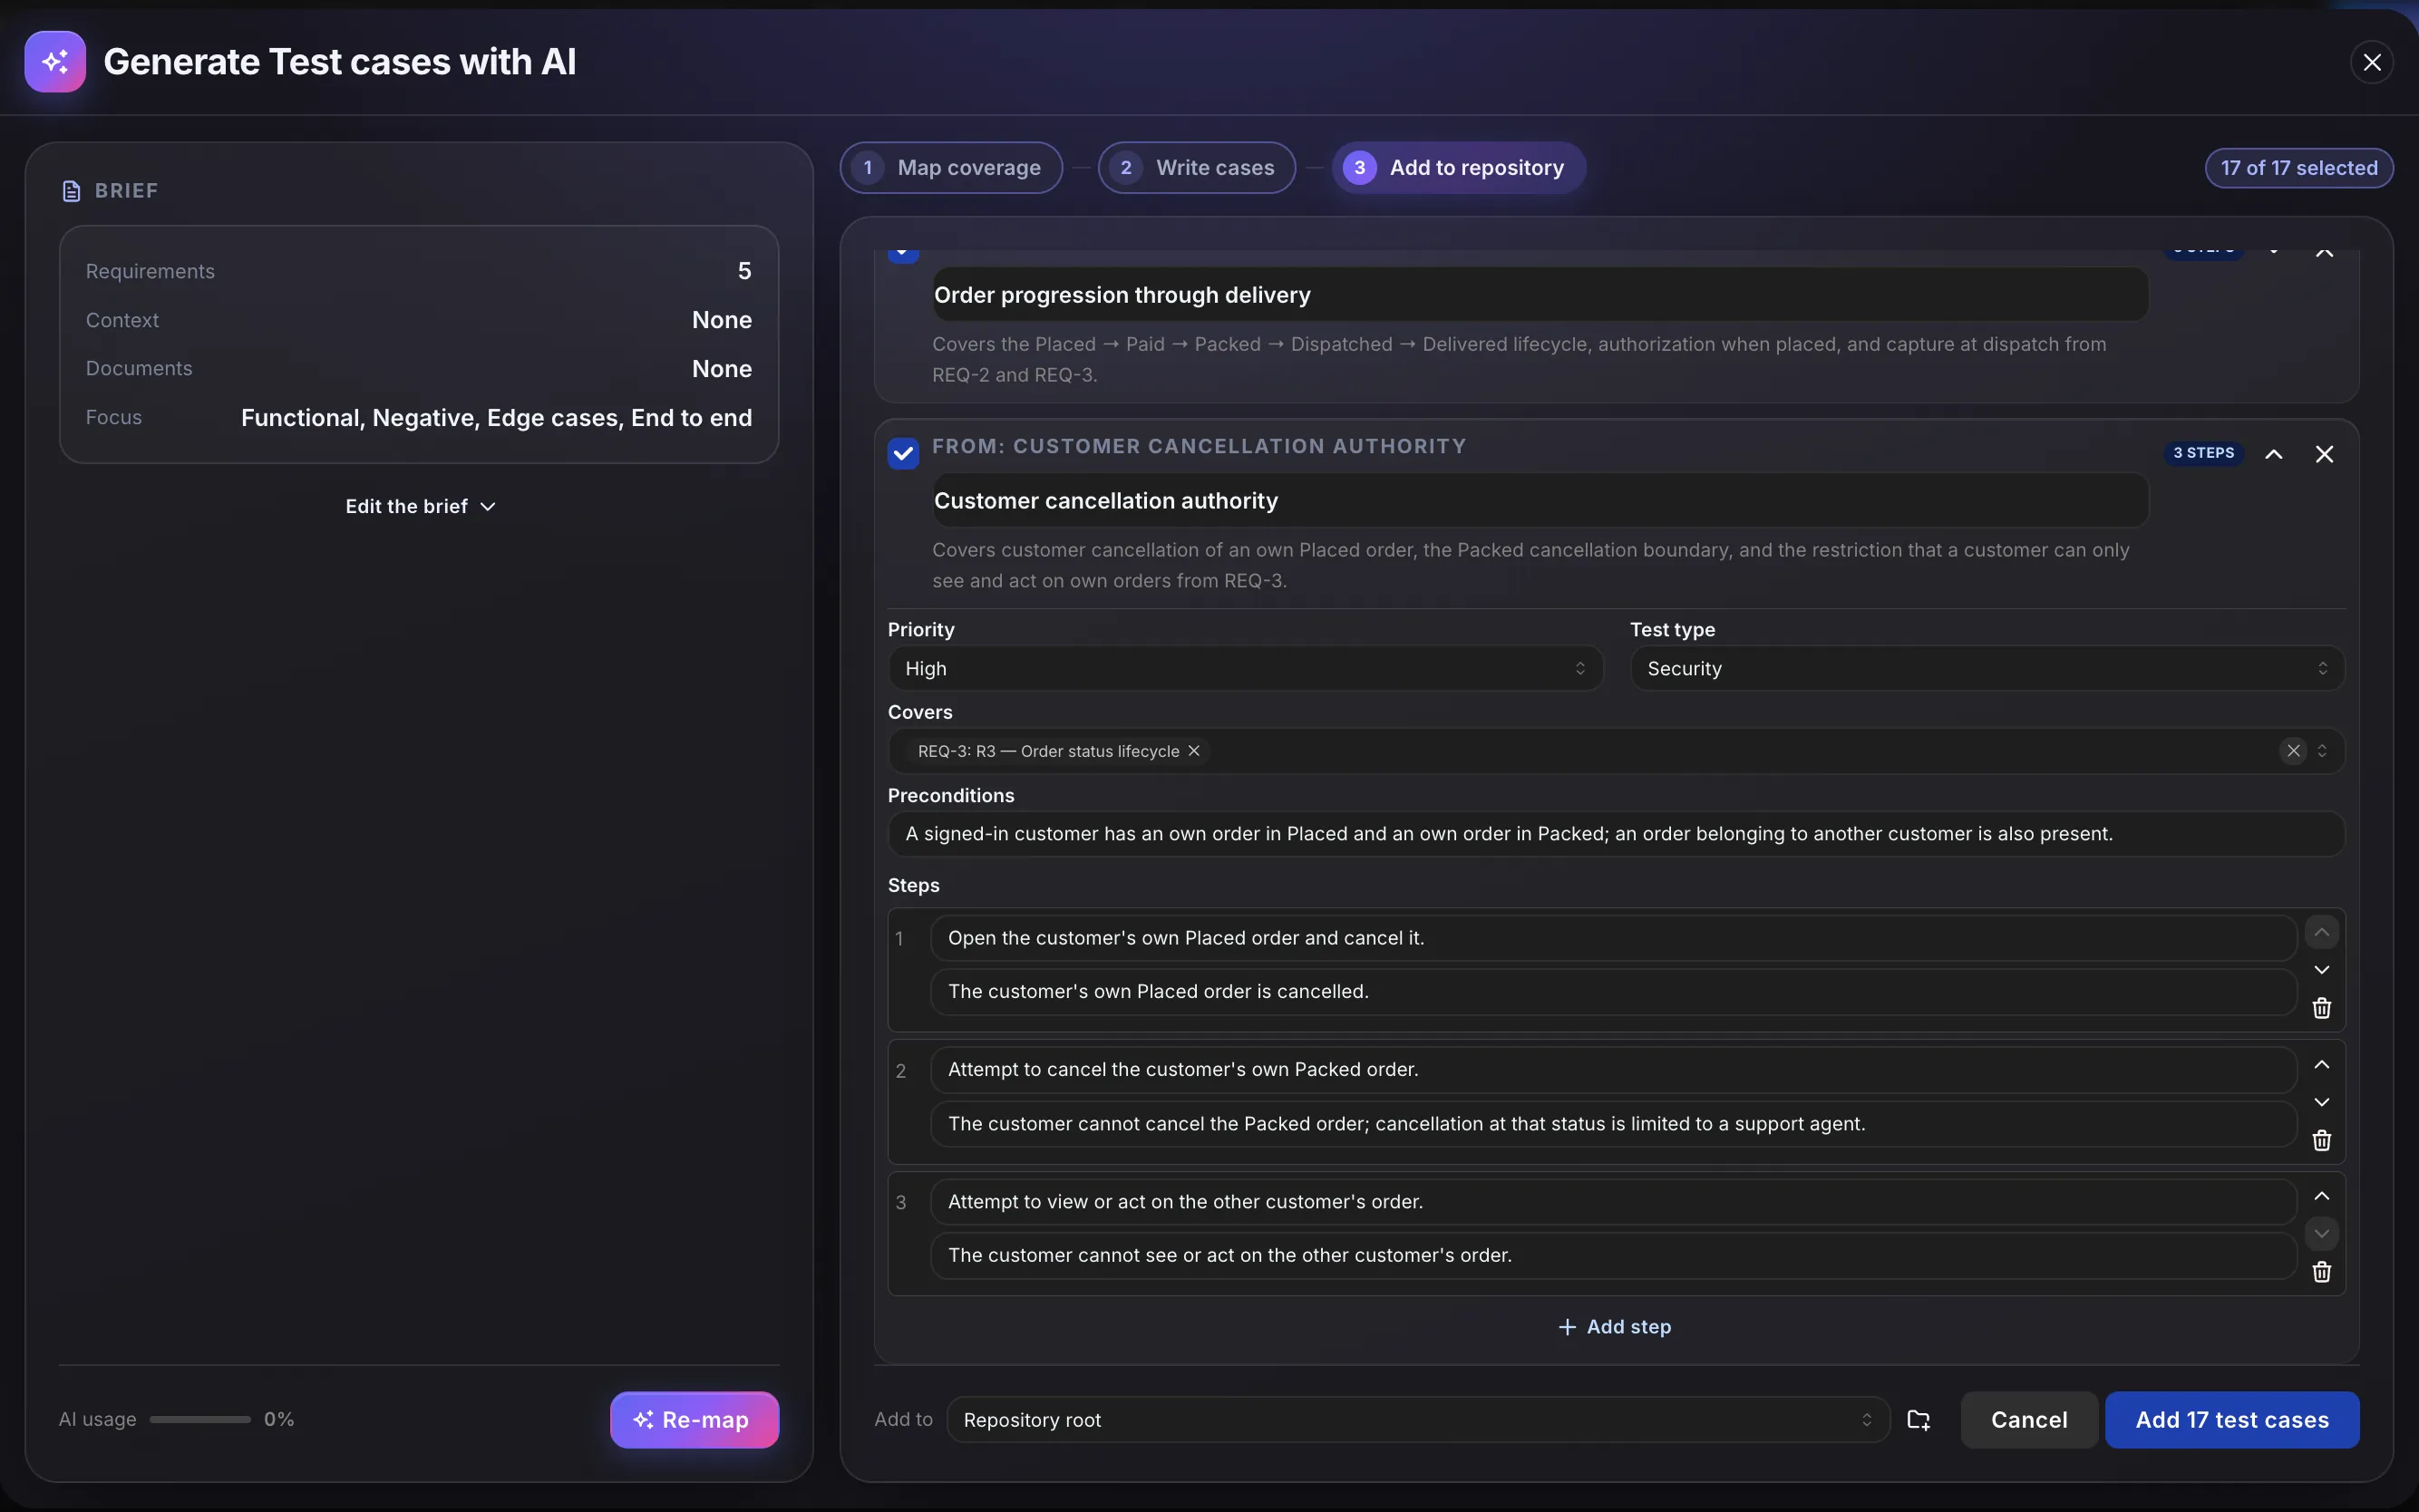
The second stage turns the scenarios you ticked on the coverage map into full test cases, which you review and edit before anything is saved.
Each test case has a title, priority, test type, preconditions, and steps with expected results. Only the scenarios you ticked are written. The writer uses the same sources as the map, so the steps can name real fields and values from your documents.
Write the Test Cases
Section titled “Write the Test Cases”-
On the coverage map, tick the scenarios worth writing.
-
Choose a Step format.
-
Select the Write test cases button. It shows how many it is about to write, for example Write 12 test cases.
Test cases are written in batches of ten, and the progress indicator counts them as they arrive. You can start editing the first batch while the rest are still being written.
A run writes up to 20 test cases. If you ticked more than that, write the first set, add them, and run again for the rest.
Each batch of ten counts as one generation against the workspace allowance.
Step Format
Section titled “Step Format”Two formats are offered:
- Step / expected result: each step is one action with its own expected result. This is the default.
- Gherkin (BDD): each step is a single
Given/When/Then/Andline.
In step / expected result format, the generator splits a test case into the actions a tester actually takes, and gives each one its own expected result. A test case that really is one action stays one step; the generator doesn’t add steps that aren’t there.
Reviewing a Draft
Section titled “Reviewing a Draft”Each draft shows, without expanding:
- its title,
- the requirement it covers,
- the scenario it was written for,
- how many steps it has.
Expand a draft to edit any of it: title, priority, test type, preconditions, and each step’s description and expected result.
Two read-only notes come with every draft. Read them before you keep it:
- Rationale: one sentence on why the test case is worth running.
- Coverage note: what the test case claims to cover, written so you can check it against your source.
Check the coverage note first. If it claims something your spec doesn’t say, that’s the test case to fix or drop.
Source tags
Section titled “Source tags”When Ground in Canon is on, a draft that used your Canon documents shows a source tag for each one. The tag shows the document name and the sections used. Hover over it, or tab to it, to read the passages the draft is based on.
A draft with no source tags was written from your brief alone.
Documentation Gaps
Section titled “Documentation Gaps”Sometimes your documents say a behaviour exists but never say what it should produce, so there’s nothing to check for. These are listed under Documentation gaps, marked not test cases, instead of being written as test cases with a guessed outcome.
Each gap has source tags showing where the behaviour is mentioned, so you can open that document and add the missing detail.
Deciding What to Keep
Section titled “Deciding What to Keep”- Untick a draft to leave it out.
- Discard a draft to remove it from the list.
- Edit anything that is close but not right. Editing here is much quicker than fixing it after it’s added.
Your edits are kept when more batches arrive. Writing more scenarios in the same session only replaces those scenarios’ own drafts, never the ones you’ve already worked on.
When the Source Was Too Thin
Section titled “When the Source Was Too Thin”If your sources couldn’t support what you asked for, the run tells you instead of filling the gap:
- Fewer test cases than scenarios ticked, with a note saying the source didn’t support them.
- A gap left visible in the steps: where behaviour is implied but not stated, the step is written so the gap is obvious, and the coverage note says so.
A test case that looks finished but has made-up field names, error messages or status codes is worse than no test case.