Creating Defects - Step by Step Guide
Defects help you track issues discovered during testing and link them back to test cases, executions, and requirements. Hawzu allows you to create defects either inside Hawzu or directly in external tools through integrations.
How to Create a Defect
You can create a defect from anywhere defects are supported.
- Navigate to Defects
- Click Create Defect
- The Create Defect modal opens
- Choose where to create the defect
- Fill in the required details
- Click Create Defect
Step 1: Choose Where to Create the Defect
At the top of the modal, select where the defect should be created.

Hawzu (in house defect tracker)
Select Hawzu (in house defect tracker) to create and manage the defect entirely within Hawzu.
Use this when:
- Hawzu is your primary defect tracker
- You want full traceability within the platform
- You don’t need to sync the defect externally
External Tools (Jira, GitHub, GitLab, etc.)
Select External Tools (Jira, GitHub, GitLab, etc.) to create defects in connected systems.
Supported integrations include:
- Jira
- GitHub Issues
- GitLab Issues
- Azure DevOps
- Linear
When an external tool is selected:
- Fields are mapped based on the selected tool
- The defect is created in the external system
- Hawzu stores a reference for tracking and traceability
Note: Available fields may vary depending on the selected external tool.
Step 2: Basic Information
This section captures the core defect details.
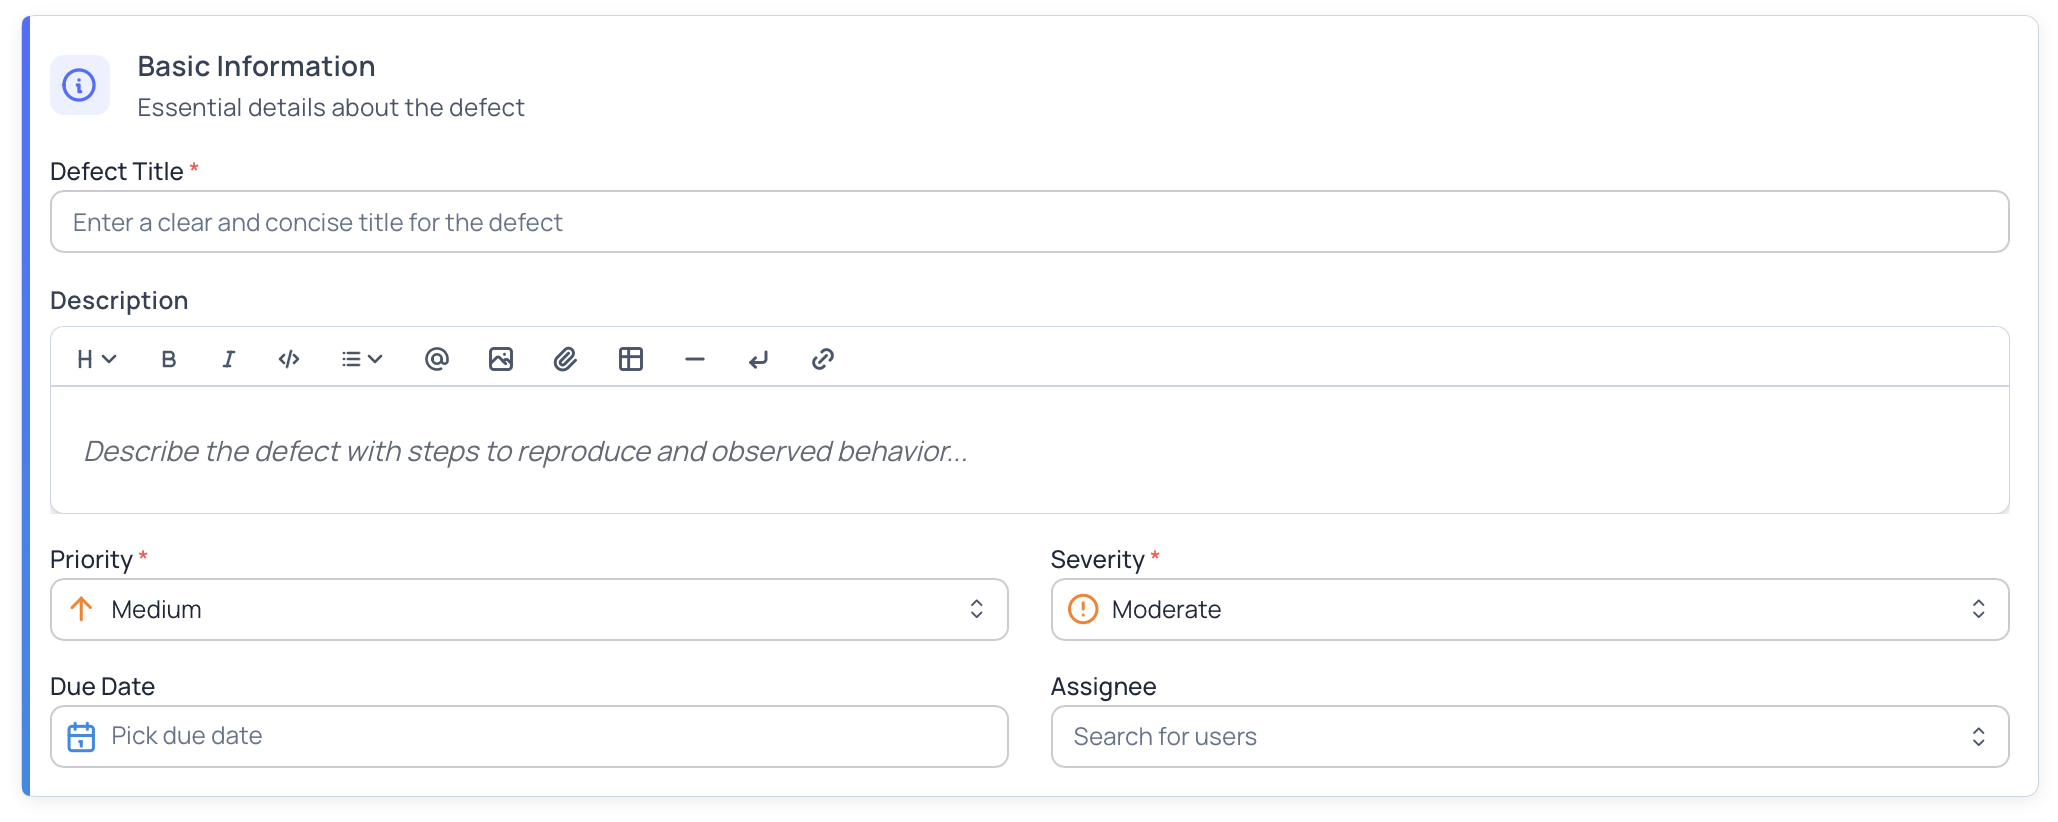
Defect Title / Summary (Required)
A short, clear summary of the issue.
Best practices:
- Describe the problem, not the solution
- Be concise but specific
Example:
Login fails when password contains special characters
Description
Provide a detailed explanation of the defect.
Recommended content:
- Steps to reproduce
- Observed behavior
- Expected behavior
- Environment or configuration details
The description editor supports rich text formatting for clarity.
Step 3: Priority & Severity
Every defect must have both Priority and Severity.
Priority (Required)
Indicates how urgently the defect should be addressed.
Examples:
- Critical
- High
- Medium
- Low
Severity (Required)
Indicates the impact of the defect on the system.
Examples:
- Blocker
- Critical
- Moderate
- Minor
Priority reflects business urgency, while severity reflects technical impact.
Step 4: Assignment & Due Date
Assignee
Assign the defect to a user responsible for fixing or triaging it.
- Optional at creation
- Can be updated later
- Supports search and selection
Due Date
Set an expected resolution date for the defect.
- Optional
- Useful for tracking SLAs and release readiness
Step 5: Traceability Links
Traceability helps you understand why the defect exists and where it was found.
Using the Traceability Links section, you can link the defect to:
- Test Cases
- Test Executions
- Requirements
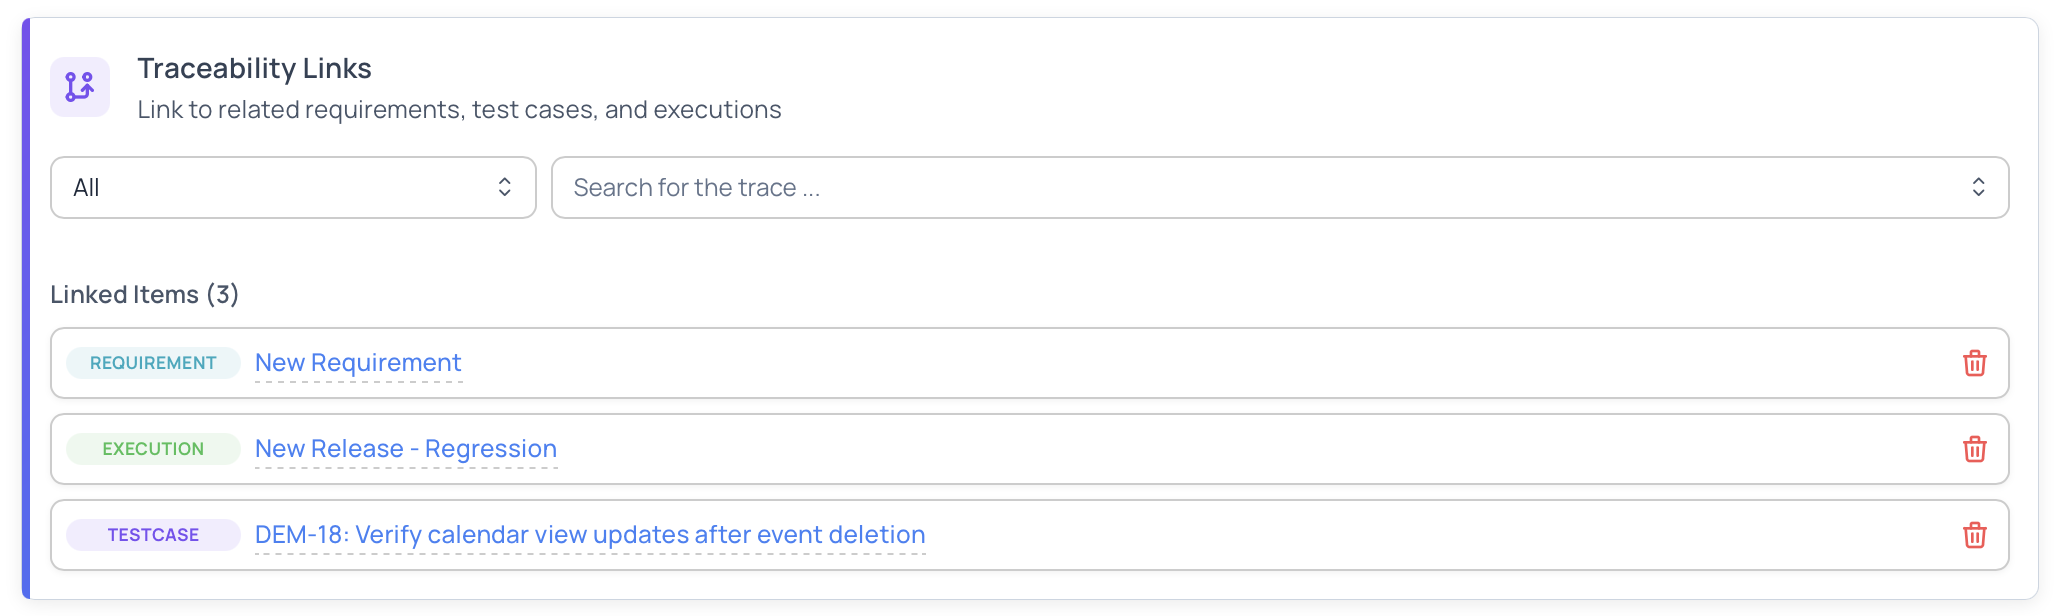
Why Traceability Matters
- Understand defect impact
- Track defects back to failed tests
- Improve requirement coverage analysis
- Strengthen audit and compliance reporting
Traceability links are visible from both the defect and the linked entities.
Creating Defects in External Tools
When using External Tools:
- Hawzu displays tool-specific fields (for example, labels or workflow state)
- Required fields depend on the external system
- Hawzu creates the defect externally and stores the reference
- Updates from the external tool are reflected in Hawzu based on integration settings
Hawzu does not override external workflows — it respects the external system as the source of truth.
Validation & Submission
Before creating the defect, ensure:
- Required fields are filled
- Priority and severity are correctly set
- Traceability links are accurate (if added)
Click Create Defect to finalize.
What Happens After Creation
Once created:
- The defect appears in the Defects list
- A unique defect code is generated
- Traceability links are established
- The defect becomes available for tracking, assignment, and lifecycle updates
Next Steps
- Learn how to View & Manage Defects
- Review Defect Filters & Insights
- Review Defect Best Practices