Projects – Workspace Guide
Projects are used to organize test cases, test runs, defects, and related testing activities for a specific application or area of work.
The Projects page is the default landing page when you enter a workspace.
Accessing Projects
To access projects:
- Open a workspace from the Workspaces page
- You will land on the Projects page at
/workspace/:workspaceId/projects - All projects in the workspace are displayed as cards
Creating a Project
-
On the Projects page, click Create Project
-
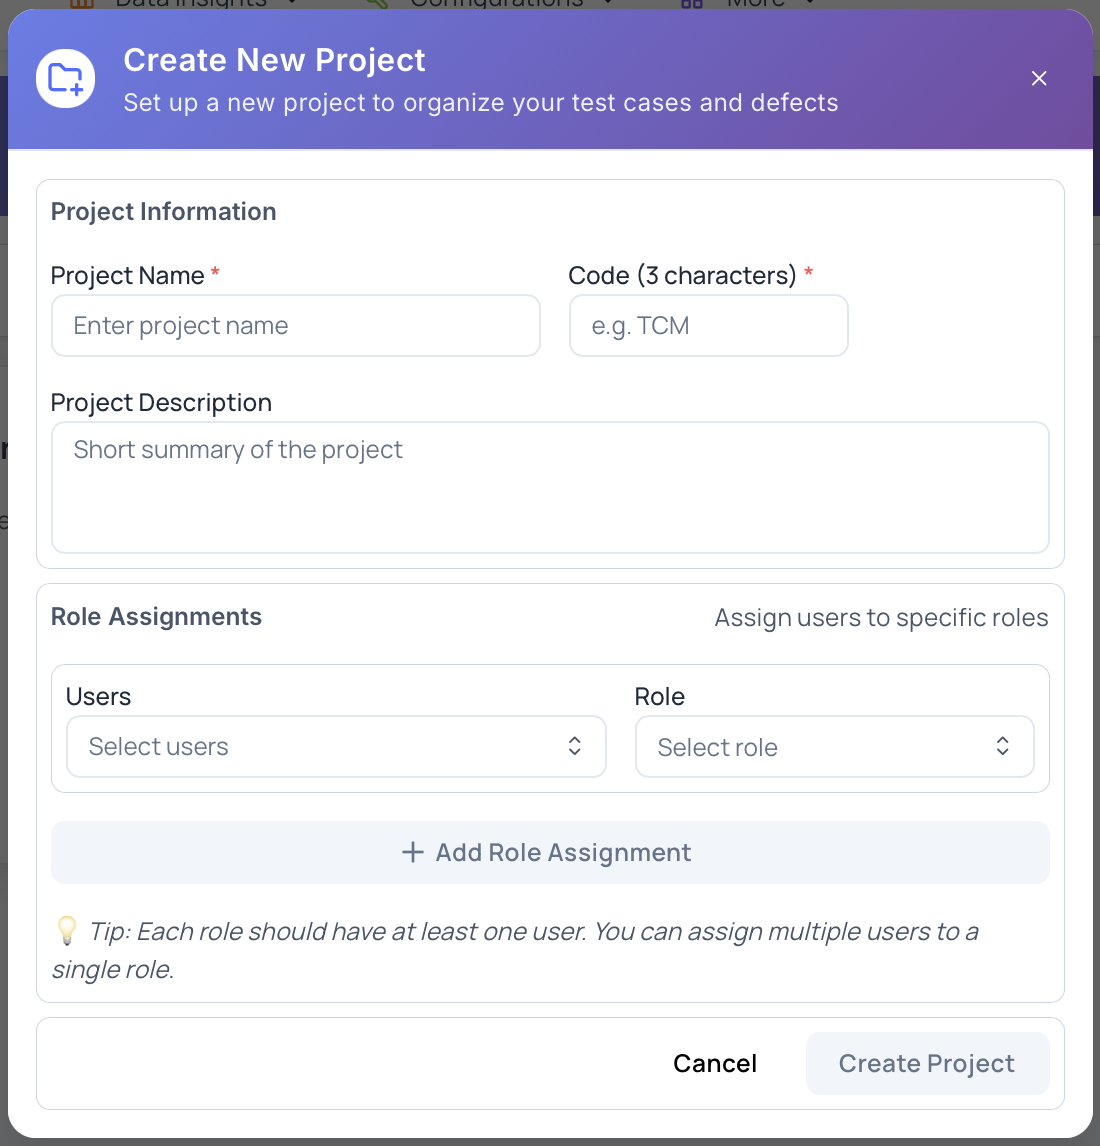
The Create New Project modal opens
-
Fill in the following fields:
Project Name
A descriptive name for the project. This field is required.Project Code (3 characters)
A short, unique code used to identify the project. The code must be exactly 3 characters.Project Description (optional)
Additional context about the project’s purpose or scope.Users & Roles
Assign users and roles to the project:- Add one or more role assignments
- Select users from the workspace
- Assign an appropriate role to each group of users
- Users and roles can be updated later
-
Click Create Project
The project is created and appears in the projects list.
Project Navigation
When you open a project, the navigation changes:
- Top header navigation remains available
- A left section navigation appears for project features such as:
- Test Repository
- Test Runs
- Defects
- Settings
This left navigation is project-specific and does not appear at the workspace level.
Permissions
Project access depends on assigned roles:
- Workspace Admin – can create and manage projects
- Project Admin – can manage assigned projects
- Project Member – can work within assigned projects
- Viewer – read-only access
Best Practices
When organizing projects:
- Use clear, descriptive project names
- Choose meaningful 3-character project codes
- Add descriptions for context
- Assign roles based on responsibility
- Create separate projects for distinct applications or products
Next Steps
After entering a project, you can:
- Explore the Test Repository
- Create and execute Test Runs
- Track Defects
- Configure Project Settings